Dropbox Syncing with iOS
Contents
- The Quick Version
- Getting Started
- Setting Up Dropbox Sync
- Preparing Projects for Syncing
- How Dropbox Works
- Keeping Projects in Sync Across Devices
- Sync Conflicts
- Why Are Multiple Files Transferred When I Only Changed One Project?
- Why Isn't Syncing Automatic?
- What About Other Syncing Solutions?
- More Help
Note: We refer to the “sync button” regularly throughout this article. The button we’re referring to is in the top right corner of the Projects list in Scrivener for iOS, and it looks like this:

The Quick Version
There's a lot of text below, but please don't let it put you off. This document was put together for those having problems syncing. It goes into great detail about all the basics, attempting to cover every single step in as much detail as possible so that anyone running into issues should be able to figure out what is going wrong. Really, once you're set up, sync should be as simple as this:
- Edit on your Mac or Windows machine, and wait for the changes to be synced by the Dropbox desktop client.
- Close the project on desktop and open Scrivener for iOS.
- Tap the sync button to download any changes to your projects.
- Begin editing the project on Scrivener for iOS.
- When finished, return to the Projects screen and tap the sync button to upload any changes.
- Reopen or return to the project on macOS or Windows.
- Rinse and repeat.
If you are syncing between two iOS devices, the process is similar:
- Ensuring that the project is not open on any of your iOS devices, tap the sync button on the main Projects screen to download changes from Dropbox.
- Open the project on one of your iOS devices to edit it.
- When you’re done, return to the Projects screen and tap the sync button to upload changes to Dropbox.
- Rinse and repeat each time you want to switch between your iOS devices.
The tutorial project in the iOS version covers how to get syncing set up with much more brevity, and we also have a video tutorial on the subject of setting up and using sync. You only need to look through the instructions below if you followed the tutorial in the iOS version but ran into problems, or if you are finding syncing problematic.
Getting Started
Scrivener for iOS syncs with the macOS and Windows versions using Dropbox. You will need the Dropbox client installed and running on your desktop machine to sync with the iOS version. You can download Dropbox for free here: https://www.getdropbox.com
When Dropbox is installed on your desktop machine, it places a "Dropbox" folder in your computer's file system:
-
On macOS, you should see the "Dropbox" folder in the Finder's sidebar:
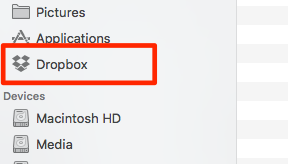
-
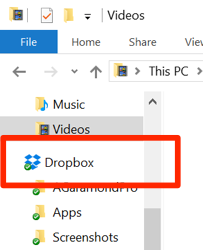
On Windows, you should see the "Dropbox" folder in File Explorer's sidebar:
You will use a folder inside the Dropbox folder to sync your projects. Before you worry about that, however, make sure that Dropbox sync is set up in iOS by following the instructions below.
Setting Up Dropbox Sync
To set up Scrivener for iOS so that it can sync with Dropbox, follow these steps:
(We also have a video tutorial on this!)
- In Scrivener for iOS, make sure you are viewing the Projects list and that you do not have a project open.
- Tap the sync button.
- Tap
Link Dropboxin the menu that appears. - If you have the Dropbox app installed on your iOS device, it will now be opened and you will be asked to grant Scrivener access to your Dropbox account. If you don't have Dropbox installed, a sign-in form will appear inside Scrivener. Either way, follow the in-app instructions and give Scrivener permission to access Dropbox.
- Once Scrivener has been allowed access to Dropbox, a Dropbox Settings panel will appear, asking you to choose a Dropbox folder. This is the folder you will use to sync projects between devices. Only projects stored inside this folder will be synced.
- For now, we'll leave the default folder selected (Apps/Scrivener) and tap
Done. Just note that you could have chosen another folder if you wanted. -
Scrivener is now linked with the Apps/Scrivener location in Dropbox, but the folder is not created until you add a project to the folder on iOS and sync. To do this:
- Tap the
+button at the top of the screen. - Enter a title for the new project and tap
Create. - Choose
Dropboxas the location to save. - The new project opens automatically. Tap
< Scrivener(or< Projectson iPad) in the upper left to return to the projects screen. - Tap the sync button.
If you have previously created the Apps/Scrivener folder in Dropbox (e.g. if you have already set up Scrivener on a separate iOS device), then creating a new project is unnecessary; Scrivener will link with the existing folder and download any files that it contains.
- Tap the
(Note that all files within the linked folder will be downloaded to the device, but only Scrivener projects will be recognized and accessible within Scrivener. The folder you choose to link with Scrivener should be dedicated to Scrivener projects to avoid unnecessary downloads.)
You're now ready to bring across some projects from the desktop version.
Preparing Projects for Syncing
The most important thing to remember is this: to sync projects between your desktop and iOS device, projects must be inside the Dropbox folder you selected when setting up sync on your iOS device. Here's how:
- Close your Scrivener project on all of your devices.
- In the Finder (on macOS) or File Explorer (Windows), click on the Dropbox folder in the sidebar. You should now see a list of folders inside your Dropbox account.
- Assuming you chose the default settings when setting up Dropbox sync in Scrivener on your iOS device, you should see an "Apps" folder. Double-click on it to reveal its contents.
- Inside the Apps folder, you should see a "Scrivener" folder. Now double-click on that.
- You are now looking inside the ~/Dropbox/Apps/Scrivener folder. It should contain the project created when setting up the linked Dropbox folder on iOS.
- Open another Finder or File Explorer window and locate a project you would like to sync with the iOS version.
- Drag the project into the ~/Dropbox/Apps/Scrivener folder, and wait for it to finish moving across. Important: Scrivener projects have the file extension ".scriv" (you might not see this on macOS if the extension is hidden). On macOS, the icon of a Scrivener project will either be black and white or have a blue bar along the left edge. On Windows, Scrivener projects are folders with a ".scriv" file extension. On Windows, it is absolutely vital that you drag the entire .scriv folder across and not just some files inside it.
- Repeat for each project you want to share with the iOS version.
When you add a project to the /Dropbox/Apps/Scrivener folder, the Dropbox client on the desktop will automatically start uploading it to the Dropbox servers:
-
On macOS, there is a Dropbox icon in the menu bar near the clock. Whenever Dropbox is uploading or downloading files a little spinner will appear in the corner of this icon, indicating activity.

Dropbox is uploading or downloading files (macOS)
Dropbox has finished syncing (macOS) -
On Windows, the Dropbox icon appears in the system tray on the taskbar, near the clock. It shows a blue spinning indicator in its corner indicating sync activity. When it has finished uploading or downloading files, it will have a little green tick.

Dropbox is uploading or downloading files (Windows)
Dropbox has finished syncing (Windows)
You must wait for syncing activity to end before trying to access your files on either platform. Until Dropbox on the desktop has finished syncing the files with its servers, not all files are available on the servers, meaning that the iOS version will not be able to download everything. If a project is only partially downloaded, the iOS version won't be able to open it (and you may see an error).
Once you have moved the project to the /Dropbox/Apps/Scrivener folder and Dropbox has finished uploading all the files, you are ready to download them to your iOS device by opening up the iOS app and tapping the sync button.
Scrivener for iOS will now download the projects you have added to the /Dropbox/Apps/Scrivener folder. Once it has finished downloading, the projects will appear in the projects list, and you can tap on them to open and edit them.
You can change the Dropbox folder used for syncing at any time. See Changing Your Dropbox Sync Folder.
Note: if your project is particularly large (in file size, not necessarily in the number of documents it contains), syncing it for the first time could potentially take a long time, because all the files will need uploading from your desktop machine to the Dropbox servers, and then downloading from the Dropbox servers to your iOS device. Please see the section on Tips for Faster Syncing for a trick to speed this up.
How Dropbox Works
You now have your projects set up so that you can edit them on iOS. Before we look at how you keep all your changes in sync between devices, it's a good idea to know how Dropbox works. Consider the diagram below:
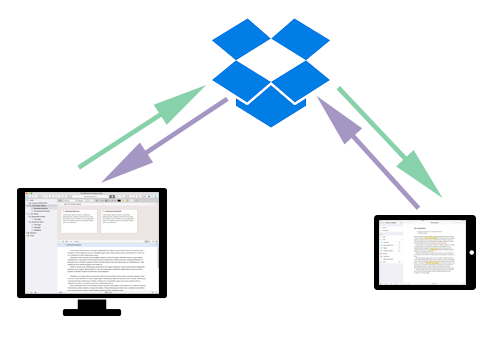
- Whenever you make a change on your desktop machine, the Dropbox app uploads the change to the Dropbox servers.
- Whenever the Dropbox app on the desktop detects a change on the Dropbox servers, it automatically downloads it.
- If there are any conflicts (because, for instance, the Dropbox app detected that you edited the same file on two devices), Dropbox will make a "conflicted" copy so that you don't lose anything.
- When you sync on iOS, Scrivener for iOS downloads any changes that are reported by the Dropbox servers.
- During the sync, the iOS app also uploads any changes that have been made to the Dropbox projects on the device.
- Like the Dropbox app, it will make copies of any files that seem to have been edited on two devices at the same time.
What this means is that you do not need an internet connection to work with projects that are set to sync with Dropbox. Both your desktop machine and your iOS device have a local copy of the project that you can work on. You make sure your changes are available everywhere by tapping the sync button on iOS to download or upload changes and by letting the Dropbox app do its work on your desktop machine.
Now that you have your projects in the right Dropbox folder and know a little about how Dropbox works, it's on to the most important part - keeping your projects in sync.
Keeping Projects in Sync Across Devices
Everything up to now you only need to do once. This section covers how you keep projects in sync - you'll be following this routine regularly, every time you move back and forth between devices. Here's how:
Editing Projects on the Desktop
Let's say you have made some changes in Scrivener for macOS or Windows. To make sure all those changes are synced to iOS:
- Make sure you open your projects from where they are stored (in our example, the /Dropbox/Apps/Scrivener folder) when opening them in the desktop version and making changes.
- After you've made changes in the desktop version, close the project.
- Wait for Dropbox on the desktop to sync all changes (see the images in the Preparing Projects for Syncing section: on macOS, make sure the syncing spinner in the Dropbox icon in the menu bar has finished and disappeared; on Windows, make sure the blue syncing spinner in the Dropbox icon in the system tray has stopped and changed to a green tick). If you don't do this, all the files may not be available when you try to open the project on iOS, and you may get sync conflicts.
-
Once Dropbox has finished syncing on the desktop, tap the sync button in iOS. This will download all the changes you made in the desktop version. (Note: if the project is open on iOS when you tap "sync", it will prompt you to close the project.)
This can be done at any time. You can do so immediately, or hours later when you think of something you'd like to add to your project. The important thing established in step 3 is that your work is already online, you just need to get it down to the mobile device before you start working.
-
You are now ready to edit the project on iOS!
Editing Projects on iOS
Now you've made some edits to the project on iOS, and you want to make sure they are all available on Dropbox and your desktop machine:
- Tap the sync button in the iOS version and wait for sync to complete.
- Back on your desktop machine, wait for the Dropbox app to finish syncing. (Again, see the images in the Preparing Projects for Syncing section).
- Open the project. All the changes from iOS will be incorporated and you will be able to continue working from where you left off.
Creating Projects on iOS
Once you have set up Dropbox sync on iOS, whenever you create a new project you will be asked where you want to save it. If you choose to save it to Dropbox (as opposed to locally on your iOS device), the project will be saved in the Dropbox folder you selected earlier. You will then tap the sync button to upload it to Dropbox's servers. When you want to open it on the desktop, you open it from the Dropbox folder you have linked in iOS (e.g. /Dropbox/Apps/Scrivener).
Creating Projects on the Desktop
To create a project on the desktop that you want to sync with the iOS version, when you are prompted to choose a save location, simply choose the Dropbox folder you set up for syncing with iOS (e.g. /Dropbox/Apps/Scrivener). Once you've done that, all the steps for syncing are exactly the same as above.
Moving Projects to Dropbox on iOS
After you have set up Dropbox sync on iOS, you can move projects from the local-only storage into Dropbox by tapping the Edit button at the top of the Projects screen, then using the grab bars to the right of the project name to drag each project from the On my iPad/iPhone section to the Dropbox section. (The list will be alphabetised automatically, so the project may not appear exactly where you dropped it.) A blue triangle will appear on the project icon, indicating it has changes to sync, and the project will be uploaded to Dropbox the next time you tap the sync button.
You can move projects out of Dropbox to your device's local storage the same way. The project will be deleted from the Dropbox server when you next sync iOS.
Remember
Always ensure that Dropbox on the desktop has finished syncing all files before trying to access projects on the desktop or syncing on the iOS version. If you don't wait, not all of the files will be on the Dropbox servers, so Scrivener won't have access to all of the project's data and you may run into errors.
Sync Conflicts
Occasionally, Scrivener may alert you that it has detected sync conflicts. This will only ever happen if you have edited the project on more than one device or machine without syncing in between. (For instance, say you edit on your Mac and then make edits on iOS but forgot to hit the iOS sync button).
If you make sure everything is synced, you'll never run into this issue. If you do, though, don't worry. You may receive one of two messages:
- Scrivener may tell you that it resolved all sync conflicts successfully. If so, you don't need to do anything - Scrivener managed to fix all the conflicts without any problems.
- Sometimes you might be told that conflicted files have been added to a "Conflicts" folder. This happens if you edited the same document on two devices without syncing, so that there are now two versions of the same text. In this circumstance, Scrivener leaves it to you to decide which one you want to keep - it will never make an assumption and delete something you may need. You'll find the "Conflicts" folder near the bottom of the binder. It will have a yellow warning triangle as the icon, and inside you will find a folder with today's date. Inside that are older copies of any files that have been edited on two devices. Check them against the versions in the main binder to see which version you want to keep. You can trash the one you don't want.
Why Are Multiple Files Transferred When I Only Changed One Project?
A Scrivener project is a folder containing many different files. Each document in the binder is represented by a different text file on disk; each note is a separate text document too. There is also a file containing the main binder structure, and various settings files. This file format allows Scrivener to work with very large projects, and to keep memory usage to a minimum. When you load a project in Scrivener, it only loads into memory the files it needs (such as the binder structure). It then loads other files as they are requested - for instance, when you select a text document in the binder to load it into the editor, only then will the text be read from disk and into memory.
This is why you may see the Dropbox sync report that it is uploading multiple files, even though you only edited a single project. If you open a project and make a text change in one document, for instance, not only is that document changed, but its modified date is recorded in the binder file, and a UI settings file is updated to note the current document that is open and its current scroll position.
Why Isn't Syncing Automatic?
Scrivener for iOS requires you to tap the sync button whenever you want to sync. Whenever you tap this button, all files that have been changed on the device are uploaded to the Dropbox servers, and anything that has been changed in the Dropbox folder and uploaded to the Dropbox servers from other devices will be downloaded.
You may have seen other apps offer an automatic, background sync and are wondering why Scrivener uses such a manual solution, with the user needing to invoke sync explicitly. The reason lies in Scrivener's file format.
As explained in the section above, so that Scrivener can support large projects and research files, each Scrivener project is stored on disk as a folder or “package” full of files. The files inside a project are interdependent. The file describing the binder structure, for instance, lists all of the files that are available in the project, and those files are stored as separate files inside the Scrivener project package. A text document may contain a reference to a comment that is stored in a separate file.
This means that, when syncing, it is absolutely crucial that all of the files in a project are transferred, otherwise you could end up with a project missing important files, which could result in an invalid project.
It is also important that files don't just appear one at a time while a project is open. For instance, if the binder structure file suddenly changed because of an automatic sync, but none of the files it referenced were yet downloaded, a project could become unusable - and this would be especially bad if you lost your internet connection before the other files became available.
There is also the issue of data integrity. What happens if you make edits to a project with no internet connection, then make edits in the same project elsewhere, then only get an internet connection later? An automatic background sync would overwrite all the older files with the newer files, but the newer files would be from two different versions of the project. The project would now be in an invalid state and, even if Scrivener repaired the project, the chances are that you would have lost some work.
Manual sync allows Scrivener to ensure projects are always fully synced - as long as the sync completes successfully, you know that your projects are up to date and ready to use. It also allows Scrivener to deal with any sync conflicts on occasions where a project is edited on two devices at the same time, because manual sync gives Scrivener full control to check the versions of files online against the local versions without anything getting overwritten automatically.
Most apps don't have to deal with these sorts of considerations. Most apps use a single file for each project or document. For instance, in Pages, each document is a single file on disk (or on iCloud). Automatic background sync then becomes relatively easy, because if you are working on a document and it is changed elsewhere, Pages only has to deal with conflicts in that single file and can ask you which version of the two you wish to keep - it is not dealing with dozens (or even hundreds) of interdependent files that must be managed as a unit in order to ensure your projects are available and error-free.
All of this is necessary to provide the advanced features of Scrivener. To change Scrivener to use a single file format such as that used by Pages would require us to remove all of Scrivener's research features, so that Scrivener only ever had to deal with small projects that it could read into memory as a whole.
Of course, sync technologies are constantly advancing, and we will continue to evaluate Scrivener's synchronisation. Once syncing technology catches up with our requirements, you can be sure we will adopt it. Unfortunately, with a single coder working on the macOS and iOS versions, we don't currently have the resources of Apple or Google, which would be required to create that technology ourselves!
What About Other Syncing Solutions?
Currently, there are no plans to add support for syncing with other cloud solutions such as iCloud or OneDrive. As much as we love iCloud, it is not currently compatible with the sort of file format used by Scrivener (please see the section above on Why Isn’t Syncing Automatic? ).
We will continue to evaluate other sync solutions, but we may also need to expand as a team in order to support them. The Dropbox sync code is thousands of lines of code, and we would need to replicate much of it for each sync solution we supported. Currently both the iOS and macOS versions are coded by a single developer, with two other developers working on the Windows version, so there are manpower and resource considerations as well as technical obstacles.
More Help
If you are still running into trouble, see Quick Troubleshooting for iOS Syncing.